Taking my inspiration from both the work of Chris Cunningham and Vicky Steckel, I am going to be using photoshop to create a pure white intense image besed around the idea of healing and robotics. It does sound like an odd combination, but with the image I have formulated within my own mind, I think that this is most probably the easiest way to explain it. As well as that I plan to play with the colours of arden, not only the reds, blacks and whites, but the terra-cotta/ peach colour of the actual cream.
I am going to use just 1 of my 3 images to show how I constructed my 3 final images as the same process was applied to all, in exactly the same ratios and amounts.
The first thing I need to do is resize the images to A3 so that any cropping can be done at the beginning of post production. The height of an A3 image is 42cm and the width of an A3 image is 29.7cm.

This then changes the image size to 49.8M. Where it had previously been around 22.9M with a RAW file and 8 Mega Pixel Camera.
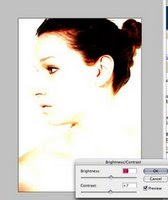
The next step was to add a duplicate layer in which to control and adjust the contrast and brightness of the image. The reason for doing this is to change the intensity of the white and create the pure look I was trying to achieve.


You must vary the opacity in order to create the desired level of contrast between the original image and the new layer. I chose to keep it at 100% because I needed the intensity to be high

Next on the same duplicate layer I changed the curvature of the shadows and highlights in order to create vibrant features that stood out against the white skin and back ground.
 The next thing I did was to flatten the image, so that the duplicate layer and original now became one layer. This meant that I could now start cloning out unwanted shadows and the hair line.
I didn't like the dark shadow around the neck line and so I removed it with the use of the cloning tool.

In looking at each image I then decided where the image would need cropping in order to maximize the potential of the photograph and also use space within the frame most aesthetically.
In this image there was far too much space and so I cropped the image using the A3 limitations.
This is how I cropped the image.
I then noticed there was a dark shadow around the jaw line that I thought should be removed. Again using the cloning tool I persisted with cloning the area to the bright white of the background.


This is the finished image.


No comments:
Post a Comment